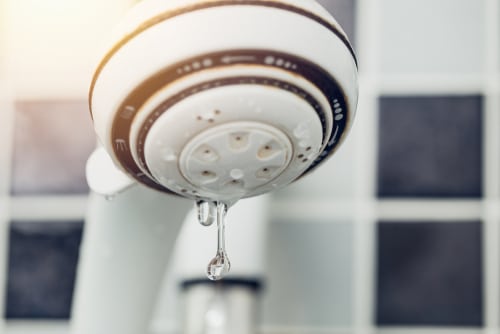


Welcome to our comprehensive guide on fixing a leaking shower head. A leaky shower head can be a frustrating problem that leads to wasted water and higher utility bills. However, with the right knowledge and tools, you can easily resolve this issue on your own. In this guide, we will walk you through the step-by-step process of fixing a leaking shower head, ensuring you can enjoy a refreshing shower without any unwanted leaks.
Understanding the Causes of a Leaking Shower Head
Before we dive into the repair process, it’s important to understand what causes a shower head to leak. The most common causes include:
- Worn-out washer: Over time, the washer inside the shower head can wear out, leading to leaks.
- Loose connections: Loose fittings and connections can result in water seepage.
- Mineral deposits: Mineral buildup can clog the shower head, causing water to spray in different directions and potentially leak.
- Faulty diverter valve: A malfunctioning diverter valve can cause water to leak from the shower head even when the tub spout is engaged.
Tools and Materials You Will Need
To fix a leaking shower head, gather the following tools and materials:
- Adjustable wrench
- Screwdriver (Phillips or flathead, depending on the type of screws)
- Plumber’s tape (Teflon tape)
- Replacement washers
- Clean cloth or towel
Step 1: Turn Off the Water Supply
Before you begin the repair process, turn off the water supply to your shower. Locate the shut-off valve near the shower or use the main water shut-off valve for your home. This step will prevent any water from flowing while you work on fixing the leaking shower head.
Step 2: Disassemble the Shower Head
Use an adjustable wrench to unscrew the shower head from the shower arm. Place a clean cloth or towel over the shower arm to protect it from scratches while you unscrew the shower head. Gently twist the shower head counterclockwise until it comes off.
Step 3: Inspect and Clean the Components
Carefully inspect the shower head and its components for any visible signs of damage or mineral buildup. If you notice mineral deposits, soak the shower head in a vinegar solution for a few hours to dissolve the buildup. Use a toothbrush or small brush to scrub away any remaining debris. Rinse the shower head thoroughly with water.
Step 4: Replace the Shower Head Washer
Inside the shower head, you’ll find a rubber washer that may be worn out or damaged. Remove the old washer and replace it with a new one of the same size and shape. Ensure the washer sits snugly in the designated area.
Step 5: Apply Plumber’s Tape
To prevent water from seeping through the shower head connections, wrap plumber’s tape (Teflon tape) around the shower arm threads in a clockwise direction. Make several wraps around the threads to ensure a tight seal.
Step 6: Reassemble the Shower Head
Carefully screw the shower head back onto the shower arm by turning it clockwise. Use an adjustable wrench to tighten the connection, ensuring it is snug but not overly tight. Take care not to overtighten and risk damaging the shower head or the shower arm.
Step 7: Test for Leaks
Once you have reassembled the shower head, turn on the water supply to test for leaks. Allow the water to flow for a few minutes and observe if any water drips or leaks from the shower head. If there are no leaks, congratulations! You have successfully fixed your leaking shower head. If leaks persist, double-check the connections and repeat the steps.
Additional Tips to Prevent Leaking
- Regularly clean your shower head to prevent mineral buildup.
- Replace washers periodically to ensure a tight seal.
- Avoid overtightening connections to prevent damage.
- Consider installing a water pressure regulator if your shower head leaks persistently.
Conclusion
Fixing a leaking shower head is a manageable task that can save you money and prevent water wastage. By following the step-by-step instructions provided in this guide, you can easily resolve the issue on your own. Remember to inspect, clean, replace washers, and apply plumber’s tape to ensure a tight and leak-free connection. Enjoy your shower without any unwanted leaks!
FAQs
1. How long does it take to fix a leaking shower head?
The time required to fix a leaking shower head depends on the severity of the issue and your familiarity with the process. Generally, it can take anywhere from 30 minutes to an hour to complete the repair.
2. Can I use household items to clean my shower head?
Yes, you can use a vinegar solution or a mixture of baking soda and water to clean your shower head and remove mineral deposits. These household items are effective and readily available.
3. Is plumber’s tape necessary to fix a leaking shower head?
Yes, plumber’s tape (Teflon tape) is essential to create a watertight seal and prevent leaks. It is an inexpensive and effective solution to ensure a proper connection.
4. Should I hire a professional plumber to fix a leaking shower head?
If you are comfortable with basic plumbing tasks and have the necessary tools, you can fix a leaking shower head yourself. However, if you are unsure or uncomfortable with the process, it is advisable to seek assistance from a professional plumber.
5. Why is it important to fix a leaking shower head promptly?
Fixing a leaking shower head promptly is crucial to conserve water, reduce utility bills, and prevent potential water damage. Ignoring a leaking shower head can lead to further complications and costly repairs down the line.